شاید شما هم مثل من از اون دسته افرادی باشید که خیلی دوست ندارن اپلیکیشنشون رو پر بکنن از لایبراری های متفاوت و سعی دارن تا جایی که میشه لایبراری های مورد نیاز رو خودشون بنویسن تا هم یکسری تکنیک هارو یادبگیرن و هم اینکه از افزایش حجم اپ و مشکلات تداخل لایبراری ها و deprecate شدنشون دوری کنن
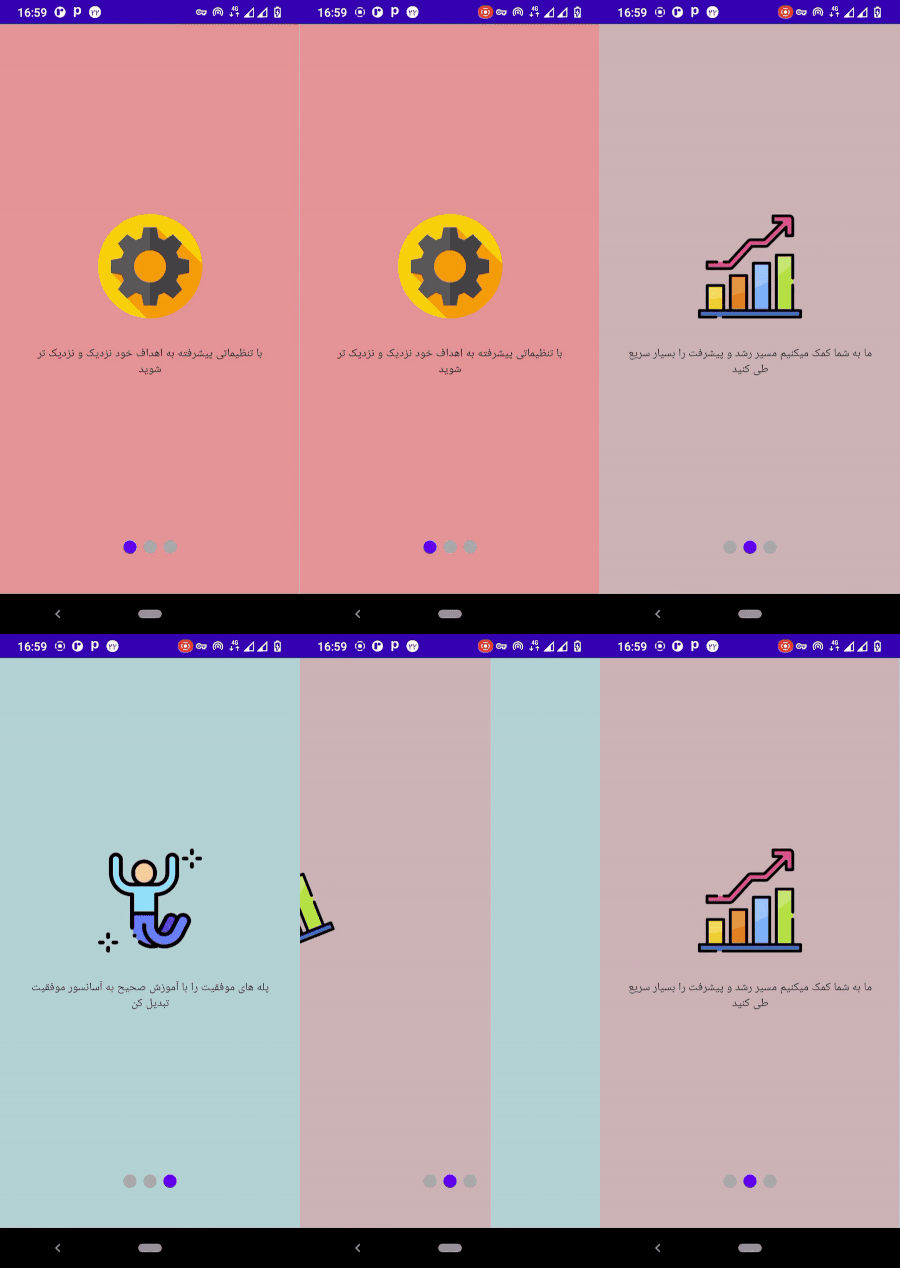
خب بریم سر اصل مطلب :
برای پیاده سازی این پروژه به سه فایل اصلی نیاز داریم :
1 : ScreenSlidePagerActivity
این فایل قراره توی نمایش اسلاید ها و swipe کردن بینشون با استفاده از viewpager2 بهمون کمک کنه :
public class ScreenSlidePagerActivity extends FragmentActivity { /** * The number of pages (wizard steps) to show in this demo. */ private static final int NUM_PAGES = 3; /** * The pager widget, which handles animation and allows swiping horizontally to access previous * and next wizard steps. */ private ViewPager2 viewPager; private TabLayout tabIndicator; /** * The pager adapter, which provides the pages to the view pager widget. */ private FragmentStateAdapter pagerAdapter; @Override protected void onCreate(Bundle savedInstanceState) { super.onCreate(savedInstanceState); setContentView(R.layout.activity_screen_slide); // Instantiate a ViewPager2 and a PagerAdapter. viewPager = findViewById(R.id.pager); pagerAdapter = new ScreenSlidePagerAdapter(this); tabIndicator = findViewById(R.id.tabIndicator); viewPager.setAdapter(pagerAdapter); //add animation to items when transferring viewPager.setPageTransformer(new PageTransformer()); //show state of slides with dots in bellow of page new TabLayoutMediator(tabIndicator , viewPager , (tab , position) -> {}).attach(); } @Override public void onBackPressed() { if (viewPager.getCurrentItem() == 0) { // If the user is currently looking at the first step, allow the system to handle the // Back button. This calls finish() on this activity and pops the back stack. super.onBackPressed(); } else { // Otherwise, select the previous step. viewPager.setCurrentItem(viewPager.getCurrentItem() - 1); } } /** * A simple pager adapter that represents 3 ScreenSlidePageFragment objects, in * sequence. */ private class ScreenSlidePagerAdapter extends FragmentStateAdapter { public ScreenSlidePagerAdapter(FragmentActivity fa) { super(fa); } @Override public Fragment createFragment(int position) { switch (position) { case 0: return ScreenSlidePageFragment.getInstance("#e69597", R.string.intro_1, R.drawable.settings); case 1: return ScreenSlidePageFragment.getInstance("#ceb5b7", R.string.intro_2, R.drawable.growth); } return ScreenSlidePageFragment.getInstance("#b5d6d6", R.string.intro_3, R.drawable.jump); } @Override public int getItemCount() { return NUM_PAGES; } } }
2 : ScreenSlidePageFragment
این فایل که درواقع همون اسلاید های اینترو رو، که شامل یک عکس و یک متن هستن رو شامل میشه
public class ScreenSlidePageFragment extends Fragment {

    public static  ScreenSlidePageFragment getInstance(String backgroundColor  , int desc , int iconRes){
        ScreenSlidePageFragment frag = new ScreenSlidePageFragment();
        Bundle bundle = new Bundle();
        bundle.putString("color" ,  backgroundColor);
        bundle.putInt("desc" , desc);
        bundle.putInt("icon" , iconRes);
        frag.setArguments(bundle);
        return frag;
    }

    @Override
    public View onCreateView(LayoutInflater inflater, ViewGroup container,
                             Bundle savedInstanceState) {
        ViewGroup rootView = (ViewGroup) inflater.inflate(
                R.layout.activity_screen_slides, container, false);


        TextView txt = rootView.findViewById(R.id.txt);
        ImageView img = rootView.findViewById(R.id.imgIcon);
        LinearLayout lytRoot = rootView.findViewById(R.id.root);


        String col = getArguments().getString("color" , "#ffffff");
        int iconRes = getArguments().getInt("icon");
        int desc = getArguments().getInt("desc");


        img.setImageResource(iconRes);
        txt.setText(desc);
        lytRoot.setBackgroundColor(Color.parseColor(col));

        return rootView;
    }

    @Override
    public void onViewCreated(@NonNull View view, @Nullable Bundle savedInstanceState) {
        super.onViewCreated(view, savedInstanceState);
    }
}
خب حالا میرسیم به قسمت شیرین ماجرا و هندل کردن انیمشن های آیتم های صفحه که توسط این فایل انجام خواهد شد :
3 : PageTransformer
public class PageTransformer implements ViewPager2.PageTransformer {
    private static final float MIN_SCALE = 0.85f;
    private static final float MIN_ALPHA = 0.5f;


    @Override
    public void transformPage(@NonNull View view, float position) {

        int pageWidth = view.getWidth();
        int pageHeight = view.getHeight();

        ImageView icon = view.findViewById(R.id.imgIcon);
        TextView txtDesc = view.findViewById(R.id.txt);

        if (position < -1) { // [-Infinity,-1)
            // This page is way off-screen to the left.
            view.setAlpha(0f);

        } else if (position <= 1) { // [-1,1]
            // Modify the default slide transition to shrink the page as well
            float scaleFactor = Math.max(MIN_SCALE, 1 - Math.abs(position));

            float vertMargin = pageHeight * (1 - scaleFactor) / 2;
            float horzMargin = pageWidth * (1 - scaleFactor) / 2;
            if (position < 0) {

                view.setTranslationX(horzMargin - vertMargin / 2);
            } else {

                view.setTranslationX(-horzMargin + vertMargin / 2);
            }
            icon.setRotation(position * 60);
            icon.setTranslationX(position * 500);
            txtDesc.setTranslationX(position * 1500);

            // Scale the page down (between MIN_SCALE and 1)
            //view.setScaleX(scaleFactor);
            //view.setScaleY(scaleFactor);

            // Fade the page relative to its size.
           /*view.setAlpha(MIN_ALPHA +
                    (scaleFactor - MIN_SCALE) /
                            (1 - MIN_SCALE) * (1 - MIN_ALPHA));
*/
            view.setAlpha(1f);
        } else { // (1,+Infinity]
            // This page is way off-screen to the right.
            view.setAlpha(0f);
        }

    }
}
نکته پایانی : در فایل آخر یکسری از خطوط کد کامنت شدن که میتونست برای خوانایی بهتر کد و تمیز تر بودنش پاک بشن ولی به نظرم اومد وجودشون و کمی بازی کردن باهاش میتونه کارهای جالب تری رو خلق کنه
امیدوارم بتونه مفید باشه براتون ❤️
منابع : android pager with dots , screen slides